
My travel blog is mostly about travel — and coffee — and a lifestyle without haste. Since I started blogging about coffee, my coffee posts are mostly about interesting coffee-related stuffs that I came across during my travels. With this post, I am starting a new chapter in coffee brewing. I will share what I learnt in the process and also how I travel around for coffee beans, visit interesting cafes and try more special / specialty coffees.
I started with instant coffees and traditional kopi-O at home since young and continued to do so for many years due to the ease of making a cup of coffee, especially before rushing to work. The thought of brewing my own coffee had never cross my mind. It was not until I came across August Drip Coffee, a coffee-roaster-cum-cafe in Johor Bahru, that aroused my interest to self-brew coffee. It was not “love at first sight” though, I took the first step after several tries.
August Drip Coffee’s staff are enthusiastic to share their knowledge on brewing coffees, especially with someone like me who knows nothing. After visiting the cafe few times to have pour-overs to try their roasted coffee beans, I began nursing the idea to try self-brewing at home — not to mention that pour-overs are much more expensive than buying roasted coffee beans home to self-brew. It seemed very simple when I watched how they brewed coffees with different types of Hario V60 and Origami drippers.
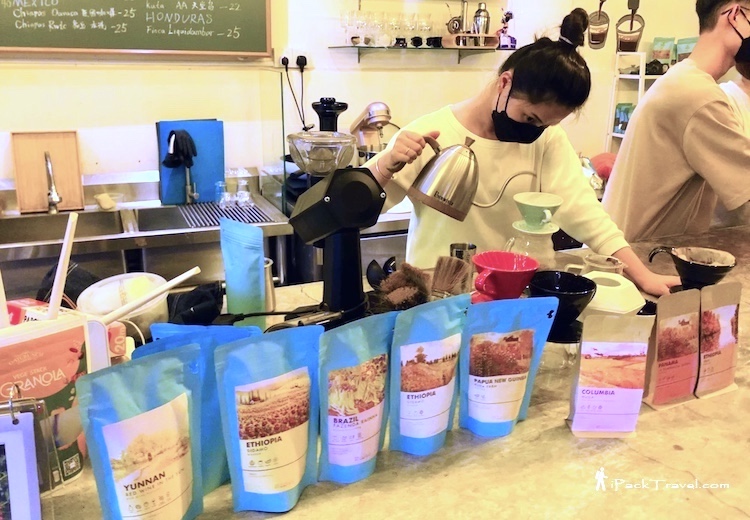
More: JB Cafe: August Drip Coffee (八月咖啡工作室) @ Taman Century
Before starting to brew coffee, there are 3 aspects to take care of:
- Fresh roasted coffee beans
- Coffee wares
- Brewing techniques
Fresh Roasted Coffee Beans
Roasted coffee beans are usually packed in resealable bags with a one-way valve (with several holes) on it. That valve allows carbon dioxide (CO2), a by-product of roasting coffee beans, to escape from the bag and also to stop outside air from entering.
In the few days immediately after roasting (known as the resting period), the roasted beans need to de-gas most of the CO2 before they can be brewed. However, there will still be CO2 trapped inside the beans, which is why the “blooming phase” is important when brewing coffee.
Watch: A Beginner’s Guide to Resting Coffee (by James Hoffmann)
Freshly-roasted coffee beans are best stored in beans form and can stay fresh for about 3 weeks after roasting — light roasts tend to stay fresh longer and darker roasts have shorter freshness period. But the first few days to a week is used for de-gassing. That gives about 2 weeks of freshness before the fading aroma becomes obvious. For this reason, it will be better to buy roasted coffee beans in small bags of 100~250 grams, not in bulk.
If 15 grams of coffee beans are used per brew, a 250-gram bag will give about 16 cups of coffee. That will last about a week for 2 cups of coffee per day, or 2 weeks for just 1 cup of coffee a day.
One more thing, after opening the bag to pour out some beans for brewing, reseal the bag and squeeze out the air inside it as oxygen will have gotten in and start the oxidation process (degradation) in the beans.
Specialty coffees are expensive. So it will be better to get the cheaper beans when learning how to brew coffee and not forgetting about diminishing freshness. However, be mindful that low-quality coffee beans can affect brew results too.
I have 2 ways to get roasted coffee beans (and expendable V60 filter papers) at cheaper prices:
- Go over the border to Johor to get them from cafes or coffee factories. Due to the exchange rates, buying in Malaysia is cheaper than in Singapore. For brewing with drippers, I will prefer to visit cafes to have pour-overs to try the tastes of the coffee before buying.
- Shop online. I will search for a list of roasted coffees that I wish to try, add them to the shopping cart and use it as a watchlist. When discounts are offered for any of the coffee beans, I will buy a pack when my coffee beans are running low. Do get from sellers that can deliver the beans within few days after roasting. The only downside is I won’t be able to try the coffees before buying.
Coffee Wares
Before I can brew properly, say, using V60 technique, I need to gather the necessary hardware:
- Hario V60 dripper (plastic is cheap and better thermal stability)
- Hario V60 filter papers
- Digital coffee scale with 0.1 gram accuracy
- Gooseneck pouring pot (alternative to gooseneck kettle)
- Coffee grinder (manual)
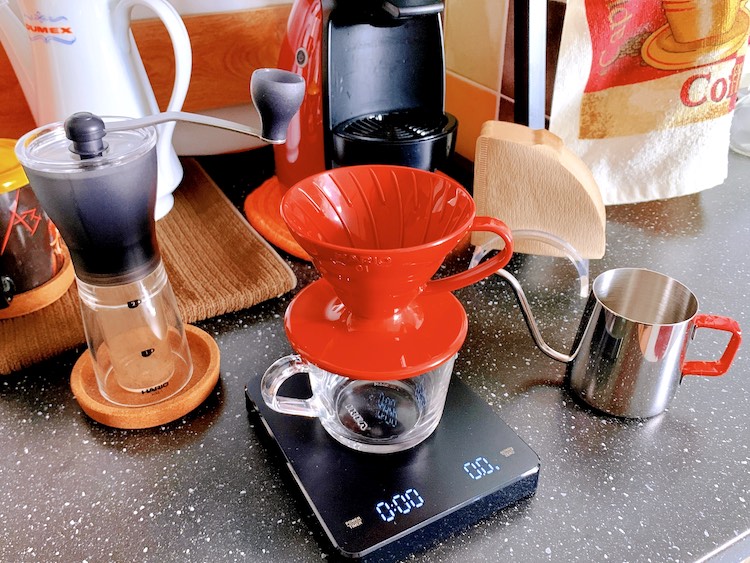
I was quite hesitant to get the coffee wares initially due to limited space on my kitchen countertop. Things started moving once I took the leap.
From just one cup and one teaspoon to make my cup of instant joe everyday, there are now more coffee wares. My initial investment works out to be around S$68 for the gears. Aside from coffee beans, the expendable filter papers incur running cost too.
The only hardware not in the list above is an electric kettle with temperature control. First, I have a still-functioning kettle and I don’t need 2 kettles. Second, I have no space for another bulky item on my countertop. Third, electric gooseneck kettle with temperature control is expensive. Lastly, maintaining constant water temperature throughout the brewing process is not crucial to me.
According to the video below, I do not have to get a constant-temperature kettle specifically for brewing coffee. A normal kettle will do nicely. I just have to maintain consistency in the brewing process once the water is boiled.
Watch: Brew your Coffee with Boiling Water (by James Hoffmann)
I prefer coffee beans of medium roast that have lower acidity, lower bitterness and fuller body. So, by using about 30 seconds to rinse the paper filter and pre-heat the dripper after the water is boiled and through heat losses in the metal pouring pot, the plastic V60 cone, the surrounding air, etc, my brewing temperature should be around 90°C during extraction and even lower at the drawdown phase. That works just fine.
V60 Brewing Techniques
For V60 coffee brewing techniques, I learnt from two champions on YouTube:
1. James Hoffmann, an English barista, YouTuber, entrepreneur, coffee consultant and author, who won the World Barista Championship in 2007 (Wikipedia). He has tons of videos about coffees on YouTube, including experiments that he conducted to address coffee-related myths.
James Hoffmann’s V60 Technique:
- For 2 cups: The Ultimate V60 Technique
- For 1 cup: A Better 1 Cup V60 Technique
2. Tetsu Kasuya, a Japanese barista, who won the world Brewers Cup of 2016 and is the first world champion in Asia.
Tetsu Kasuya’s 4:6 Method:
- Standard V60: Coffee Brewing Theory “4:6 Method”
- Kasuya V60: How to use V60 Dripper Kasuya Model
From all the videos (and several others that are not mentioned) in this post, I listed down most, if not all, of the factors that can affect a brew:
- Type of coffee bean (characteristics, type of roast, rest period, etc)
- Grind size of coffee ground
- Type of dripper (construction, material, etc)
- Type of filter (paper, cloth or metal)
- Coffee beans to water ratio
- Water (temperature, mineral contents, etc)
- Brewing time (pour intervals)
- Number of pours
- Amount of water for each pour
- Pouring technique (pour height, pour speed, etc)
That’s 10 factors minimally! And they are just the surface of it. For example, “Coffee beans to water ratio” alone consists of 2 variables: amount of coffee beans and amount of total water to use.
With 2 variables, there will be at least 4 sets of varying conditions that may result in more than 4 possible outcomes. With 10 or more variables, there will be more than 100 possible outcomes. And that is terrifying! I will rather give up brewing coffee than to brew over 100 cups of coffee to find the best brewing combination for any coffee beans — and I will definitely forget the taste of the first cup after 10 cups of coffee.
As such, the key is to keep majority of the factors either constant or consistent and vary just one or two variables at a time. James Hoffmann proposes to adjust grind size of coffee ground to taste. Tetsu Kasuya recommends adjusting the amount of water for the first 2 pours to balance acidity and sweetness and number of pours to adjust the strength of the brew.
In the two videos that demonstrated Tetsu Kasuya’s 4:6 Method, the first video uses a standard V60 dripper whereas the second one uses a “V60 Kasuya model” where the rips near the bottom of the cone are removed. Tetsu Kasuya modified the dripper to stall the flow of water. This shows that the rips on drippers can affect brews too.
So far, my results using the V60 techniques have been quite satisfactory, after many tries, but still not good enough as I tend to make mistakes here and there — trying to perform mental sums first thing in the morning before coffee can be error-prone. It is easier to write down the timings and amount of water after each pour and refer to it while brewing.
To make my life easier, I created a little app called “Brew Coffee” to help me manage recipes and narrate tasks to me, with ticking timers, while I focus on brewing my coffee. No more little pieces of paper that keep diverting my attention away from the tasks on hand. Is the app still on App Store? Nope, Apple finds it too simple and wanted me to add features to “bloat” it, so I removed it from App Store and use it myself.
I just want a cup of delicious self-brew coffee everyday, not trying to become a barista, so what I need is a technique that gives me what I want and is easy for me to apply — ideally. In reality, different flavours of coffee beans and diminishing freshness will call for adjustments to the brewing method for reasonable extraction according to personal taste preference. So, good understanding of whichever technique used is key to having great coffee every day.
Rescuing Poor Brews
During the learning phase or when carrying out experiments, I will standby some sugar and table salt, which are readily available in the kitchen, in case I botch a brewing process that results in a cup of coffee that is either too acidic or too bitter. I will add in some sugar to reduce the acidity or a few drops of salt solution to mitigate the bitterness so as not to waste the cup of coffee.
Watch: The Magic of Salt in Coffee (by James Hoffmann)
For botched brews that are under-extracted, I added instant coffee to create “blends” with mixed flavours. For over-extracted brews, I will add milk to subdue the tastes. I try to avoid adding sugar unless I am going for some workout after coffee.
As a novice to coffee-brewing, there are still a lot of things that I have yet to discover. I am keeping this post alive, which I do for all my posts actually, and continue to update here as I progress through the beginner phase. For lengthy topics, I will start new posts under the “Self-Brew Coffee” series.
Next:





Leave a Reply